
Part 1: Add the person to Case Manager:
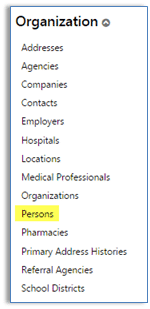
- To access the Person entry screen, from the Menu select Admin | Intuition | Organization | Persons.
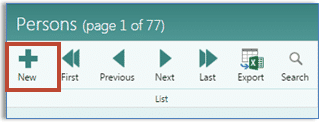
- When the list of Persons appears, select +New on the top left corner of the page.
-
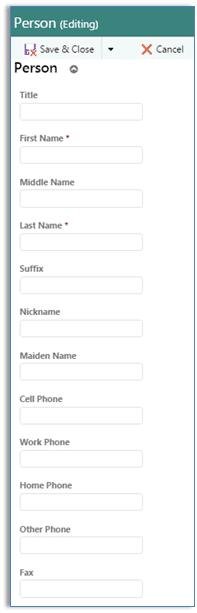
Enter the demographic information of the person that you are creating. Required fields are indicated with a red asterisk and must be completed before the person’s record can be saved.
-
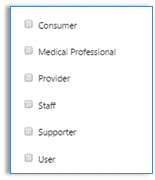
Scroll toward the bottom of the list to the series of check boxes. Check the boxes that apply to the person you are entering. Choose Supporter. If the person is a Medical Professional, select that as well. Do NOT check any of the other boxes if this person is not actually part of your organization.
- When you have completed the information, click Save & Close at the top of the page.


Part 2: Connect this new Person record to the Consumer’s record:
- From the Menu, choose Consumers to display the Consumer list.
- Search for the Consumer. Click on the pencil icon to edit the Consumer record.
- From the Consumer’s “My Profile Page,” select the “Life Plan” icon.

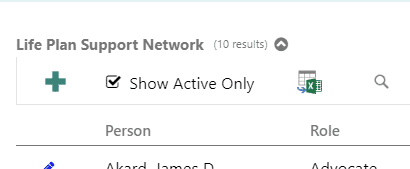
- Scroll down to Life Plan Support Network and click on the green + sign to add a new record.
- From the drop down list, select the Person you just created in Part 1 of this document.
- Select the appropriate role from the drop down list.
- Enter other data on the page as needed/desired per your organization’s requirements.
- Click Save and Close.
- The new Person is now connected to the consumer.
- Add the Person to other consumers if needed.

